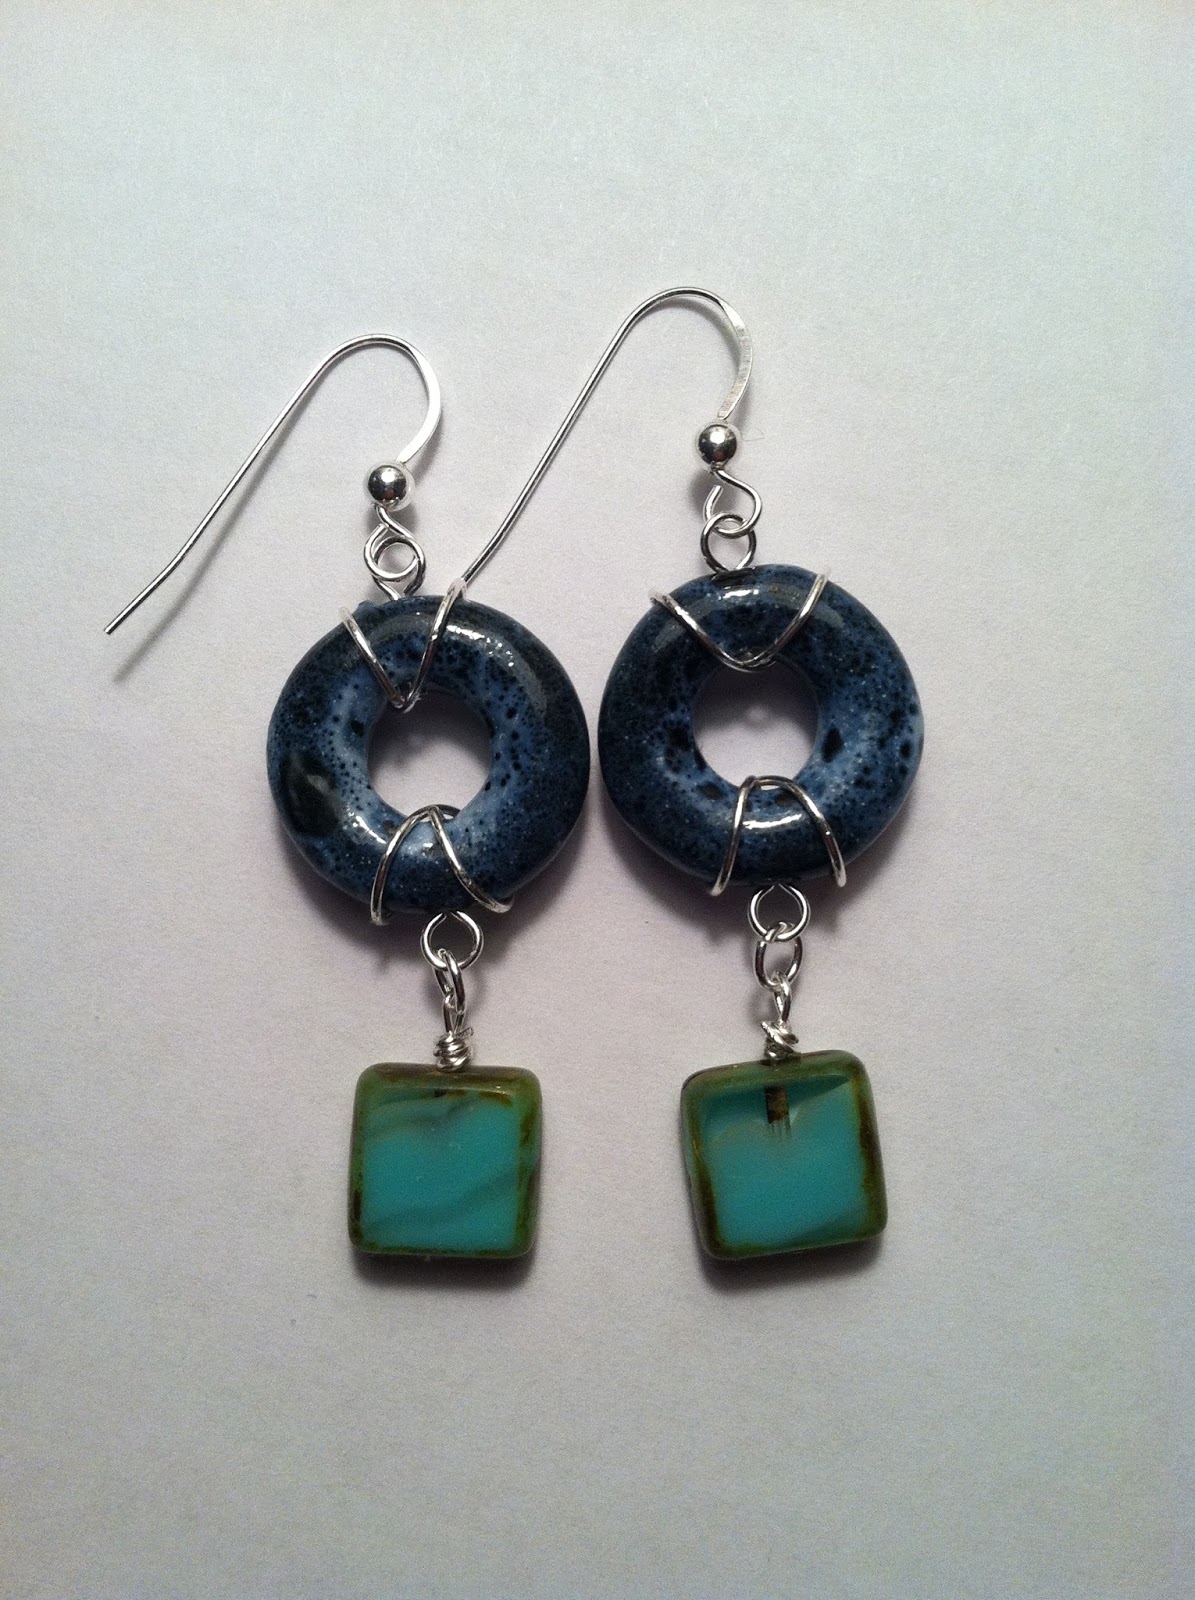
Here is some handmade jewelry I have made recently. The following is the latest pair of sterling silver earrings I've completed and am absolutely in love with! These are by far my favorites so far:
When this bead catches the light just right, it shines as you can see in the right earring in this picture. They are absolutely beautiful!
This is a hemp bracelet I've also made recently. This bracelet is done with a square knot that has a twist to it. I'm thinking about doing a tutorial for this kind of bracelet as well in the future.
Monday, September 9, 2013
Friday, September 6, 2013
Lunch Quilting Progress
I finished my second quilt last night!!!! There will be lots of pictures soon, I promise :)...so now it's on to the next project!! I'm now going to do the throw quilt for my parents that I came up with my own design for. As a refresher, this is the design I'm going with:
On my lunch break today I started cutting out the large rectangles and smaller squares from the fabric panel they came in:
The rectangles are all ready to go. They are 11" x 11 1/4"
All of the squares when finished are going to be 2 1/2" x 2 1/2". At the moment they all now look like the first strip in this picture, so I just need to finish up cutting them out. I got a couple different patterned fabrics to replace the solid color blocks seen on these strips. Those will still need cut out as well. Then it will be cutting out all of the background fabric, and on to sewing!
Tuesday, September 3, 2013
Ruffle Zipper Bag
And the winner is?!?!?!?!?!.......ME!! Since there were no entries for the sterling silver earrings, that means that I get to keep them. Which, I'm pretty ok with since I love them :)
Anywho, I've done some more sewing! And I have a couple injuries to show for it, my clumsiness came out in bounds this past weekend. I managed to stab my finger with the needle on my sewing machine, and I managed to cut my arm with my rotary cutter.....who knew that sewing could be so dangerous?!
I followed the Ruffle Zipper Bag pattern from the blog See Kate Sew. I fell in love with this cute little bag, so had to give it a try. I don't have a fancy enough sewing machine to do the awesome stitching, so I just chose some pretty fabrics:
This completed zipper bag is about 4"x4" and I used a 4" zipper. This was my first try at making a ruffle, and I think it turned out pretty well. Took me a few tries to figure it out, but I got it ;)...Now to figure out what to put in it...
Wednesday, August 28, 2013
Giveaway!! Free Stuff!
I'm an impatient person. And I figure I have 22 Facebook likes and 17 Twitter followers, so that's way over 25, right?! So who wants free stuff?!
The giveaway widget is over to the right top of my blog, just leave your comments on this post so I can find them easily to email the winner! I'm super excited, and hope whomever wins these beautiful Sterling Silver Earrings enjoys them :)
Monday, August 26, 2013
Bracelet Tutorial
All you need to make this bracelet (or anklet depending on how long you make it) is a ~9"x12" piece of cardboard (I used the bottom out of a 12 can flat) and a few different colors of embroidery floss. This bracelet uses three different colors; the more colors and floss you use, the wider your bracelet will be. So here we go! As a side note, if you're new to blogging, to see the pictures larger, all you have to do is click on them. Meaning no offense! I'm new to blogging as well ;)...
1.
With scissors make one cut in the middle on the top of your cardboard, and make several cuts on the bottom of your board. The amount of cuts across the bottom of your board needs to be the amount of strings you will have in your bracelet, or more.
For my bracelet, I cut a ~6ft length of thread from each of my three colors. I like to error on the side of way too much thread than too little (I've been on the too little side too many times...). Once you have your three lengths of thread, fold them to find the center.
3.
.JPG)
Now you're going to grab the center of your three strings you just found and make a knot, leaving a loop. Pull tight.
4.
Using the center cut on the top of your cardboard, place the loop and knot behind your cardboard, with the strings coming out in the front. Arrange your strings in the order that you'd like your colors to appear in your bracelet. Separate out the strings, and put each string through a cut on the bottom of your board, make sure they are pulled snug. We're going to start the bracelet with the string to the far left.
5.
.JPG)
Pull the string to the farthest left (green) out of the bottom cut in the cardboard, and make what appears like the number "4" with your number 1 string in the picture.
Fold your farthest left string back under your number 1 string, and pull the end up through the loop created.
Pull tight.
6.
With the same green string, make a number "4" again, and this time make your loop around the 2nd string.
7.
Continue the process until you have made a knot on your 3rd, 4th and 5th string as well.
8.
Your first row on your bracelet will appear like this. Now pull the green string you just finished using down through a cut to the farthest right bottom of your cardboard.
9.
You'll now continue the process with the string that is now to the furthest left following steps 5-8. This is the process you will continue until you get to your desired length.
10.
When you get to where you have no more cuts to the right of your board, shift all of your strings back to the left of your board and continue on.
11.
Once you finish your bracelet and remove your strings from the bottom, it will curl up on itself. If you run your bracelet under water and stretch it out, it will help straighten it out. I've even wrapped bracelets in paper towels and placed heavy books on top of them to dry. Whatever you gotta do ;)
12.
Once your bracelet is dry and flat, tie a knot at the end so that the bracelet will not unravel.
13.
To tie your new bracelet on your wrist, you will basically make a bow like tying your shoestrings. This is if you want to be able to remove your bracelet. If you want to permanently leave your bracelet on, just make a knot and I would suggest putting a dab of clear fingernail polish on the knot to keep it from untying.
Leave me feedback if any part of this tutorial isn't clear enough! Hope you enjoy :)
1.
With scissors make one cut in the middle on the top of your cardboard, and make several cuts on the bottom of your board. The amount of cuts across the bottom of your board needs to be the amount of strings you will have in your bracelet, or more.
2.
For my bracelet, I cut a ~6ft length of thread from each of my three colors. I like to error on the side of way too much thread than too little (I've been on the too little side too many times...). Once you have your three lengths of thread, fold them to find the center.
3.
Now you're going to grab the center of your three strings you just found and make a knot, leaving a loop. Pull tight.
4.
Using the center cut on the top of your cardboard, place the loop and knot behind your cardboard, with the strings coming out in the front. Arrange your strings in the order that you'd like your colors to appear in your bracelet. Separate out the strings, and put each string through a cut on the bottom of your board, make sure they are pulled snug. We're going to start the bracelet with the string to the far left.
5.
Pull the string to the farthest left (green) out of the bottom cut in the cardboard, and make what appears like the number "4" with your number 1 string in the picture.
Fold your farthest left string back under your number 1 string, and pull the end up through the loop created.
Pull tight.
6.
With the same green string, make a number "4" again, and this time make your loop around the 2nd string.
7.
Continue the process until you have made a knot on your 3rd, 4th and 5th string as well.
8.
Your first row on your bracelet will appear like this. Now pull the green string you just finished using down through a cut to the farthest right bottom of your cardboard.
9.
You'll now continue the process with the string that is now to the furthest left following steps 5-8. This is the process you will continue until you get to your desired length.
10.
When you get to where you have no more cuts to the right of your board, shift all of your strings back to the left of your board and continue on.
11.
Once you finish your bracelet and remove your strings from the bottom, it will curl up on itself. If you run your bracelet under water and stretch it out, it will help straighten it out. I've even wrapped bracelets in paper towels and placed heavy books on top of them to dry. Whatever you gotta do ;)
12.
Once your bracelet is dry and flat, tie a knot at the end so that the bracelet will not unravel.
13.
To tie your new bracelet on your wrist, you will basically make a bow like tying your shoestrings. This is if you want to be able to remove your bracelet. If you want to permanently leave your bracelet on, just make a knot and I would suggest putting a dab of clear fingernail polish on the knot to keep it from untying.
Leave me feedback if any part of this tutorial isn't clear enough! Hope you enjoy :)
Monday, August 19, 2013
Sterling Silver Earrings
I got a little impatient over the weekend and ended up purchasing the last thing I needed to start making some earrings, which was sterling silver wire. Which has a whole story to go along with it of a unfriendly cashier that is apparently stingy with coupons. Thanks a bunch.....I have wire on the way through Amazon, but it was taking too long :P. So here is my sterling silver stash!
I then whipped up four pairs of sterling silver earrings over the weekend, one of them being the pair for the giveaway!!
These are all sterling silver except for the silver beads/bead spacers in the earrings. And this is the pair I've decided to use for the giveaway!!...
The blog Facebook page is up to 19 likes, so we only need 6 more before someone can win these beautiful earrings! Start spreading the word :)
I then whipped up four pairs of sterling silver earrings over the weekend, one of them being the pair for the giveaway!!
These are all sterling silver except for the silver beads/bead spacers in the earrings. And this is the pair I've decided to use for the giveaway!!...
The blog Facebook page is up to 19 likes, so we only need 6 more before someone can win these beautiful earrings! Start spreading the word :)
Monday, August 12, 2013
Completed Stuff, News....& Upcoming Giveaway!
I have lots of exciting news to share!! Because there are several things to share, this is totally deserving of a list :).
1. I've received some earring findings in the mail! Amazon officially rocks, not that it wasn't official before, but anywho....I got in my sterling silver leverbacks and sterling silver headpins! So I was able to make these beauties over the weekend:
I'm still waiting on my sterling silver wire and sterling silver open jump rings. Once I get those in I'll be able to make some different looking earrings. Pretty stoked!
2. I finished the crochet scarf I've been working on :)
For this scarf I did a double crochet stitch. The original plan was just going to be the center 3 rows, but when I was done I realized the scarf was too short. So then I decided to add the green ends to it, and voila!
3. I finished part of the mystery sewing project over the weekend for the unknowing recipient :D!! Hopefully it'll be done soon so that I can gift it and get some pictures up to share!
4. I've decided to do a giveaway!! If/when my Facebook page gets up to 25 likes, I'm going to set up a giveaway! I'm planning on it being a pair of earrings once I get the rest of my findings in. I will post a picture once I receive the rest of the supplies and make them ;). So start sharing the blog Facebook page so we can get some more likes! Sorry guys that this giveaway isn't exactly geared towards you, buuuut if you do enter and win you would get some pretty awesome handmade sterling silver earrings to gift to a girlfriend/mom/sister :)
Subscribe to:
Posts (Atom)